Your cart is currently empty!
Blog
- 


Part & Trap – Partnership Announcement
We’re excited to announce a new partnership with Part & Trap!
Part & Trap has agreed to manufacture our bracket systems in high-strength SLS Nylon, bringing professional-grade quality and durability to the Open Tool Wall ecosystem. Their precision additive manufacturing process ensures each part meets our exacting standards — combining performance, consistency, and a clean finish worthy of any workshop.
This partnership marks a big step forward in making ready-to-use, professionally produced Open Tool Wall components available to builders and creators everywhere.
Learn more about Part & Trap and their work at PartandTrap.com
 - 


CTRLPew – Partnership Announcement
We’re excited to announce a new partnership with CTRLPew!
CTRLPew has agreed to collaborate with us on media and design development, bringing their distinctive creative style to the Open Tool Wall project. The Tool Wall has already become a major supporting piece of their new film studio, and will be featured heavily across their upcoming media productions.
As part of this collaboration, CTRLPew will also be producing a series of installation, assembly, and welcome videos for our community — as well as creating plenty of content for our social media channels to showcase the system in action.
Learn more about CTRLPew and their work at CTRLPew.com and say hello to them on social media.
 - 
		
		
Open Tool Wall (OTW) Creator Agreement
This Creator Agreement (“Agreement”) is made between the Open Tool Wall Program (“OTW”) and the undersigned contributor (“Creator”).
By submitting files, designs, models, documentation, or other creative works (“Works”) to the OTW ecosystem, the Creator voluntarily agrees to the following terms and conditions.
1. Purpose and Intent
1.1 The purpose of this Agreement is to establish a standard of quality, openness, and mutual benefit for all Works contributed to the OTW program.
1.2 The Creator acknowledges that OTW operates as a collaborative, open-source ecosystem focused on the design, testing, and dissemination of freely accessible tool system components and related materials.
1.3 This Agreement reflects a voluntary commitment by the Creator to uphold and advance these shared standards in good faith.
2. Commitment to Quality and Testing
2.1 The Creator warrants that any Work submitted to OTW has been personally fabricated, assembled, and tested to confirm that it functions as intended.
2.2 The Creator agrees to ensure that all submitted Works meet or exceed a minimum testing standard, defined as the successful production and validation of the design using commonly available manufacturing or printing methods.
2.3 The Creator shall disclose any known limitations, material requirements, tolerances, or special assembly considerations necessary for proper use of the Work.
2.4 OTW may, at its discretion, request verification or evidence of testing prior to publication or certification of a Work.
2.5 This obligation promotes user safety, reliability, and the overall technical integrity of the OTW repository.
3. Commitment to Open Standards
3.1 The Creator agrees that all submitted Works shall be governed exclusively by the OTW License, which provides that such Works are:
- Free to Use – available to all users without charge or restriction for personal, educational, or creative purposes;
 - Free to Modify – open for adaptation, improvement, or incorporation into derivative works; and
 - Free to Share – redistributable in original or modified form, provided attribution to the original Creator and continued application of the OTW License.
3.2 The Creator shall not impose any additional license terms, digital restrictions, or proprietary controls on any Work released into the OTW ecosystem.
3.3 The Creator affirms support for the OTW open standards and the maintenance of attribution integrity for all Works derived from or associated with their original contributions. 
4. Agreement to Community Commercialization
4.1 The Creator acknowledges and agrees that OTW may engage in commercial activities involving the reproduction, sale, or licensed distribution of Works submitted under this Agreement (“Commercialization”).
4.2 Such Commercialization shall be conducted solely by or under authorization from OTW and exclusively for the benefit of the OTW program, including funding, outreach, and maintenance of community infrastructure.
4.3 The Creator grants OTW a non-exclusive, worldwide, royalty-bearing license to use, reproduce, modify, distribute, and commercialize the Work in connection with OTW’s mission and operations.
4.4 The Creator retains full authorship and moral rights to the Work and shall receive attribution in accordance with OTW’s standard crediting practices.
4.5 OTW may, at its discretion, share proceeds from commercial initiatives with participating Creators under separate partnership or royalty agreements, such as the OTW Partner License (OPL) or OTW Partner Commercial License (OPCL).
4.6 Nothing in this section shall restrict the Creator from using or licensing their Work independently outside of the OTW ecosystem, provided such use does not misrepresent affiliation with OTW.
5. Voluntary Participation and Ownership
5.1 Participation in the OTW program is entirely voluntary.
5.2 The Creator retains full copyright ownership of their Work, subject only to the license rights granted herein to OTW and users under the OTW License.
5.3 The Creator affirms that they are the original author or authorized licensee of the Work and that the Work does not infringe upon any third-party intellectual property rights.
5.4 The Creator indemnifies and holds harmless OTW and its affiliates from any claims arising from infringement or misrepresentation related to their submission.
6. Term and Termination
6.1 This Agreement shall take effect upon the Creator’s submission of a Work to OTW and shall remain in effect for as long as the Work is distributed or hosted by OTW.
6.2 Either party may terminate this Agreement by written notice; however, any rights granted to users under the OTW License shall remain perpetual and irrevocable for Works already released.
6.3 Termination shall not affect any ongoing commercial or licensing arrangements in progress at the time of notice.
7. General Provisions
7.1 Governing Law – This Agreement shall be governed by and construed in accordance with the laws of the jurisdiction in which OTW is registered, without regard to conflict of law principles.
7.2 Entire Agreement – This document constitutes the complete understanding between the parties concerning its subject matter and supersedes all prior communications or representations.
7.3 Modification – OTW may amend this Agreement from time to time; continued participation constitutes acceptance of any updated terms.
7.4 Severability – If any provision of this Agreement is found to be unenforceable, the remaining provisions shall remain in full effect.
7.5 Voluntary Execution – The Creator acknowledges that this Agreement is entered into freely and voluntarily, without coercion or expectation of monetary compensation beyond what is expressly provided.
8. Declaration of Commitment
By submitting my Work to the OTW platform, I hereby declare that:
- I have personally tested and verified the function and integrity of my design;
 - I commit to uphold the open standards and licensing principles of the OTW program; and
 - I authorize OTW to distribute, promote, and commercialize my Work in accordance with this Agreement for the benefit of the OTW community.
 
 - 
		
		
Get Started with Your Open Tool Wall
ITS TIME TO BUILD YOUR WALL.
This post contains affiliate links. If you click through and make a purchase, I may earn a commission at no extra cost to you.
Start Deciding
Choose your bracket system
This is the standard bracket system. A good balance of strength and utility while not being too large to fit on a wall.
Do you want to glue this to a panel to mount or do you want to mount this directly to a wall?
Wall Mount
More load support – Directly screwing the brackets to studs increases the load bearing capability of the installation.
- More Permanent
 - More precision needed during installation
 - Restricted based on stud locations
 
Panel Mount
Less load – Panel mounting requires gluing to a panel that is then mounted to the wall. Weight limits are subject to the glue used to stick it all together.
- More portable, ideal for non-permanent installations
 - More flexible with spacing and location.
 
How many columns do you want?
I recommend 2 ft of spacing between each bracket column and 1 ft of free hanging end if doing a panel mount. So for a 4ft wide panel you could have as few as 2 columns. (1ft,C,2ft,C,1ft). At 6 ft you would get 3 columns. Etc,etc.
Wall mount spacing will be determined based on the studs in your wall. I recommend 1 column per stud.
How many horizontal boards do you want?
Each board section needs 4″ of vertical space(2.5″ for the board +.5″ for the bracket above the board. +.5 inch for the bottom bracket shoe spacing below the bottom most board. So you get 4 boards per 1 ft of vertical wall space(essentially) You could have a single board setup but we suggest at least 2 horizontal boards. You will need to math out how many you want for your setup.
Start Shopping
Horizontal Boards
Refer to the table below and select the appropriate boards.
Bracket System
1×3
Actual dimensions are 2.5″x.75″. and these can be had in almost any length you need.
Fasteners
The OTW system is standardized around 1/4×20 hardware. For each horizontal board on each column of brackets you will need:
Filament
I used PLA Pro for mine, its what I had on hand. Really almost any filament will work with some caveats based on your environment. I would avoid any art-type filaments like PLA Silk. Additives of this type make the parts weaker in general.
A few of my favorites:
GreenGate 3D PETG
Polymaker (PLA Pro)
Oveture (PLA+)
Start Printing

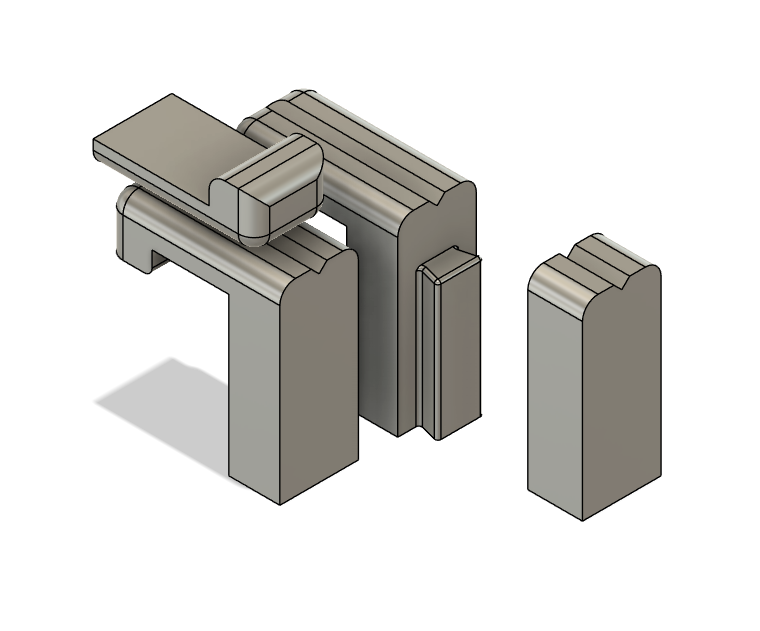
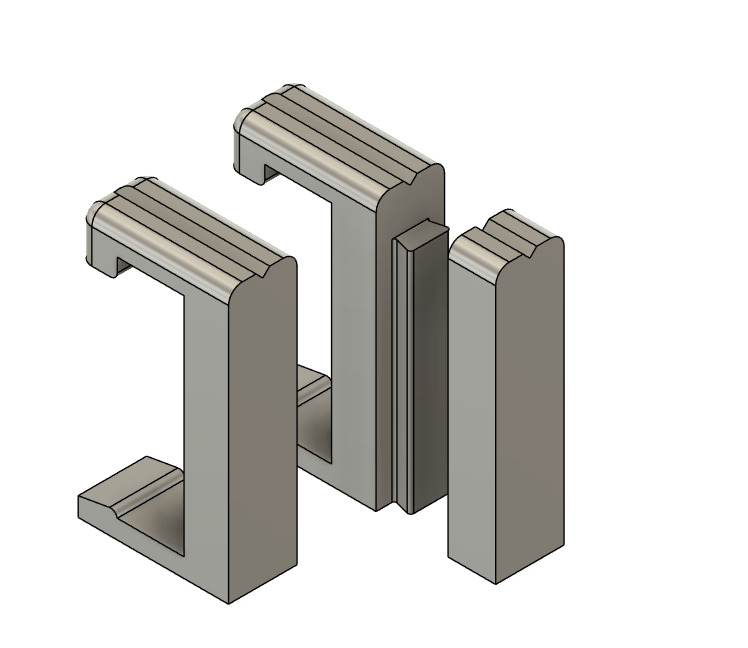
It starts with this basic set of wall brackets.
The recommended print settings are 6-10 walls at 60% infill. This is not a hard and fast rule and your mileage may vary. I suggest printing a small set to test with initially by hanging weights or sandbags from it to find the specific failure point for your filament/print profile combination.Each column will need 1 cap and 1 shoe, as many body brackets as your setup demands.
Build your wall
A full video guide will be coming soon.
Panel Mounting
Step 1 – Setup
Gather together all your materials:
- Wall Brackets ( 1 Cap, 1 Shoe, As many main bodies as you decided.)
 - Drilling Jig
 - Tools
- 1x4x20 Nut
 - 1.25″ 1x4x20 bolts
 - 1/4″ washer
 - Caulking Gun
 - Adhesive
 - Level
 - Straight Edge
 - Pencil
 - Screwdriver
 - Drywall screws
 - Wrench
 - Stud Finder
 - Drill
 - 5/16th” Drill Bit
 
 
Start by cleaning up the support material on your wall bracket prints.
Step 2 – Assemble the Panel.
- Set the panel on a flat surface large enough to fit your boards (we will need them to ensure spacing and alignment of the brackets.)
 - Measure 1-2 inches from the left and right sides of the panel.
 - With the pencil mark a vertical guide line from the top to the bottom of the panel.
 - Install a 1/4″ Nut in the recess on the back of each bracket (except the cap)
 - Apply the adhesive caulk to the backside of the bracket starting with both caps.
 - Align on the panel as desired.
 - Continue installing brackets in pairs in this manner. Each time a board channel is completed, set a board in it to ensure proper alignment.
 - When bracket installation is finished set something heavy over each column of brackets to ensure adhesion and wait to dry.
 - If more columns are required for your assembly, remove the boards and glue the columns to the panel following the previous steps.
 
Step 3 – Panel Installation
- Locate where on your wall you want your panel.
 - Get the stud finder and find the studs within that area. Mark them in a manner that will be visible with the panel on the wall.
 - Remove the weights and boards from your panel and hold the panel up against the wall.
 - using the stud location marks as reference screw the panel to the wall ensuring that it is level.
 - Once mounted, get the drilling jig and a board.
 - Align the board as desired on the wall/panel.
 - Use the place the drilling jig so its alignment features straddle the board and bracket column.
 - Place the 5/16th” drill bit in the aligning hole and drill a hole in the horizontal board.
- Be careful not to drill too far and mess up the nut. There should be a perceptible drop in force required once the drill bit comes through the back side of the board.
 
 - Remove the drilling jig and install the 1.25″ 1/4×20 bolt and washer.
 - Repeat for each column and each board.
 
More Printing
Now head into our library of stuffs and start printing your accessory brackets.
Or download our blank accessory bracket templates and build your own.